


How to Thaw Frozen Pipes Underground? – Steps to Follow

Living in a cold icy climate and living under the scorching heat are both challenging. Most of the homeowners are facing the problem of dealing with the harsh snowy environment. The homeowners face various challenges like frozen pipes, slippery ice on the sidewalk, snow-covered stairs, etc. For modern people electricity, and a good supply of freshwater is pretty essential.
Without these two, contemporary lifestyle leading is quite tricky. Every time it is not possible to call a technician to thaw your underground frozen pipe. So it is better to take information about how to thaw frozen pipes underground. And thaw your frozen underground pipe.
Hideous Frozen Pipe Problem
Many new technologies have been invented to fight the frozen pipes problem. This frozen underground pipe problem is a massive problem for income generation. This problem is not only becoming a difficulty for the owners of the house. The restaurant owners sometimes prefer to close their restaurant for the whole chilly winter.
Let’s see first why the pipes are getting frizzy after you use several layers of protecting coat. Then we proceed to the next phase and know how to thaw frozen pipes underground.
Why Do Underground Pipe Freezing In Winter?
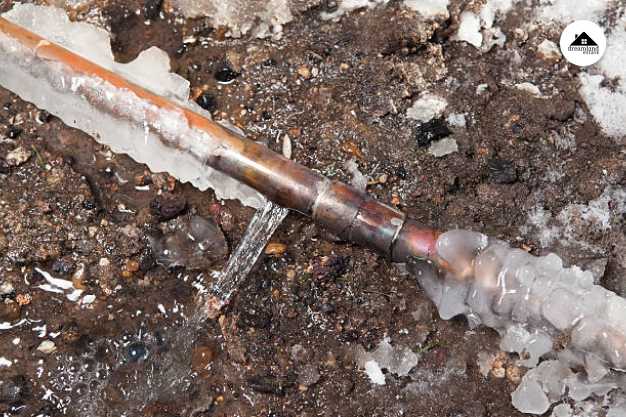
When the cold winter is approaching, the underground water pipes water is frozen out. But the underground temperature is always a little bit warmer than the natural temperature. Hence, when the chilly blaze is making the whole environment extremely cold, the underground water pipes water exceeds the lowest temperature and starts to freeze in the pipe.
When the water in the pipe freezes, it expands and creates enormous pressure inside the pipe. This situation is causing a high volume of water to start pressing the pipe’s interior. But the problem is more deep-rooted. The whole pipe unblocking is a pretty time taking process. Also, the water flow can be blocked by the small ice buildups. However, you can shorten this type of problem on your own when you know how to thaw frozen pipes underground.
At What Temperature Does The Underground Pipe Freeze?
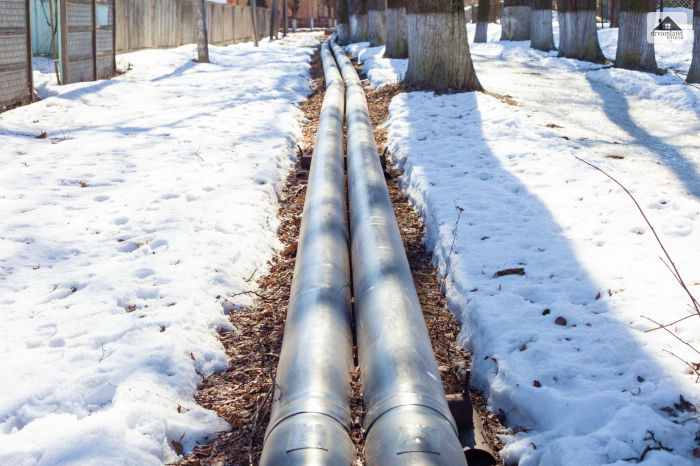
The freezing temperature of the water is 32 degrees Fahrenheit. Using insulation coating and cold-proof building materials gives little relief from the problem. When the weather drops to 18-20 degrees Fahrenheit, the pipe is getting fizzed out.
Therefore when you are living in a place where the winter is chilling. Slight insulation coating of the lines can not make your whole pipe cold-proof. But your pipe can prevent freezing and more temperature fall than usual.
What Are The Risks Of Underground Frozen Pipes?

When you stay in places where the winter temperature is shallow, the knowledge of how to thaw frozen pipes underground will help you every time.
Check out the risk factors which are attached to the frozen pipes problems.
1. Underground Pipe Bursting:
Underground pipe bursting is a substantial big problem for house owners. Hence under the ice, the bursting place finding is challenging. When the water turns into ice, it expands and creates massive pressure on the inner wall of the underground pipe. This pressure is causing bursting.
2. Irregular Water Flow:
This is the most common problem. When winter approaches, most people start to face this problem. Maybe the water inside your pipe is not frozen, but a few ice chunks are starting to block the flow of the water. For recovering from this problem, regular maintenance, especially maintenance before the winter, is highly important.
These two are the significant issues and the risk of underground frozen pipes.
How To Thawing Underground Pipes?

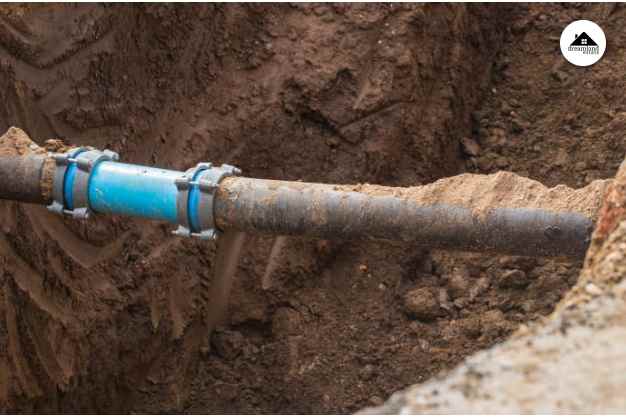
Repairing the exposed pipe is relatively easy, but how to thaw frozen pipes underground? Hence the underground pipe thawing is more frustrating. You have to spend more time to find the water line supply then dig up after thawing. So the whole process is more time-consuming.
Here are the few steps to thawing your underground pipe by a simple process.
Items that you need before starting your project.
- A pond pump
- A large storage bin
- 125 feet of 1.4-inch nylon hose
- Gate Valve
Before starting your project, apply to the water supply line and get the clearance certificate from the water company.
Locate the Frozen Pipe
You can start thawing a pipe once you locate it. Hence, you will need to first narrow down the possible location of your frozen pipe. Start by shutting off all the faucets/taps in the house. Here, test all the taps and check which ones lack pressure. If you find a problematic tap in your house, you can narrow down the possibility of using a frozen pipe.
However, if your problem is more widespread, it suggests that there is a frozen single pipe near a place from where water enters your home. Apart from that, it can also suggest that more than one pipe can be affected. Hence, to avoid pressure, make sure to leave any problematic taps to avoid buildup of pressure. Therefore, this process can help in thawing pipes.
Furthermore, you must also check the area that you suspect to be a problem. This might be a place that lacks insulation or can be a place that is extra cold to touch. Additionally, if there are pipes inside cabinets under a sink, they are prone to freezing faster. This is because they are exposed to the warmth of the room. However, if you are unable to locate the frozen area, or if you think there are multiple frozen areas, you might even consider contacting a plumber.
Step By Step Guidance For Thaw Underground Frozen Pipes
Exposed pipe repairing is a far more effortless process than underground pipe repairing. But when you know the exact process of how to thaw frozen pipes underground, you can quickly repair your underground line without professional help.
Follow the below steps and recover this problem on your own.
Step 1: Start filling your storage bin with a few gallons of natural water where the temperature does not matter.
Step 2: Check and unhook the water meter to get access to the underground supply line.
Step 3: Place that bin under the supply line’s open area.
Step 4: Then attach the gate valve to the supply line. This system is going to help you to control the heavy flow of water after the blockage removal. By connecting the valve, you can stop the water flow and run the nylon tubing.
Step 5: Use your pond pump to send the water through the nylon hose inserted in the water supply line. Repeat this process until you reach the pipe ice blockage.
Step 6: Work on the tube until the water is melting the ice blockage of the pipe.
Step 7: You have to continue this process until all the ice blockage breaks and the water supply starts to flow again without the ice barrier.
These are the seven-step easy processes to thaw your underground frozen pipe. Then, to complete your throwing process, shut off the valve and reconnect the water meter again.
Of course, finding the underground water supply line is the most challenging part of the game. But when you have the whole idea about your house’s internal structure and the supply lines, you can quickly start your repairing process.
How To Prevent The Underground Pipe From Freezing?
Now you know how to thaw frozen pipes underground. But, of course, repairing the people is a necessary specialty when you are going to face these kinds of problems and interrupted water flow. But taking precautions is the best way to overcome this kind of problem.
Here are a few processes to prevent the underground pipe from freezing.
- Cover your exterior faucets and reduce exposure to the air.
- Find out the problematic areas of the water pipes and set a heat lamp to beat the freeze. You have to be careful about the firing during this process. Keep everything aside which are flammable.
- Use the insulating materials and wrap the pipe with that.
- You also can use the electric heat tape around the pipe and avoid overlapping. Do plug this in the cold weather.
These four are the easy steps to prevent your underground pipes from freezing. But, of course, you have to apply this process before the chilly winter approaches.
Steps to Take for Above-Ground Thawing and Freeze Protection
The following are some of the major steps you will need to take if you want to thaw pipes that are above ground level if you want to protect them from freezing:
- Make sure the above-ground pipes are subject to insulation, especially if these pipes are outside the walls of your home and business.
- Your cabinet doors should be open. This will enable the warm air to circulate better. This can help to de-freeze the sinks and faucets that are outside your walls.
- Seal any small area on the wall if it allows cold air to enter the walls or offices of your home. Check areas for cable wires, internet fibers, hose bibs, exhaust vents, etc.
- If it is freezing a lot, make sure your faucets are always running. Here, all you need to do is to run the faucet with a drip or a slow stream. Basically, if the dripping stops, it can lead to the freezing of the pipe.
- Use thawing items for spots that freeze every year. This will enable you to keep your pipes clear of freezing.
However, the level of exposure of the pipe plays a big role in the strategy you must use to thaw a pipe. For example, in some cases, you can also de-freeze a pipe by wrapping a hot towel around it. Furthermore, in other cases, if you increase the flow of water on a tap, this can also lead to the melting of the ice inside.
Frequently Asked Questions:
1. How Do Thawing The Frozen Underground Pipes Which You Can’t Reach?
First, start with identifying the frozen section of the pipe. Then open the faucet of the frozen pipe. Fix a temporary heat source where the ice is blocking the water flow under the pipe. Maintain the water flow until the temperature rises in that specific area.
2. How Much Is Time Required For Underground Pipes Thawing?
Every DIY method of underground pipe throwing is going to take at least 40 to 50 minutes to complete the process. But the time of the throwing entirely depends upon the temperature of the atmosphere. Sometimes when the temperature is high, you are only going to need 30 minutes to complete the process. But in the cold chilly weather, it can take days and hours.
Wrapping It Up:
Always take all precautions and layer up the protective coats before the weather becomes worse. Checking and maintaining the underground pipes are crucial to finding the problematic areas of supply pipes. Before every winter, check your underground pipes and keep your system ready to fight against the problem.
This easy process is the proper answer for how to thaw frozen pipes underground. Which types of thawing processes are you following? Do not forget to share your winter supply line repairing tips in the comment section.
Read Also:


Leave A Reply