How to Build a Stud Wall A Step-by-Step Guide
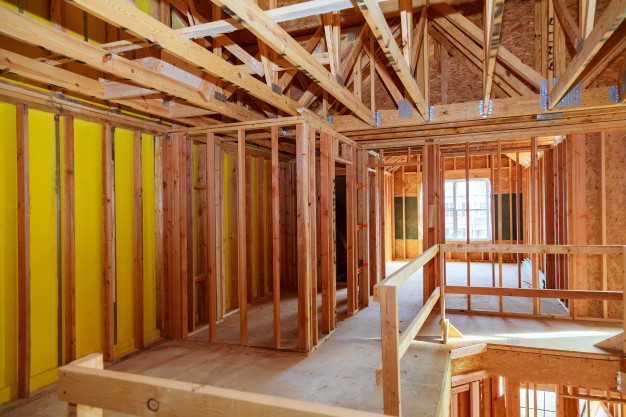
Having walls around your house makes it feel like a home. The walls can divide your home into the correct series of rooms which makes life easy. A stud wall also brings privacy in your home and makes it feel more secure. Therefore, when it comes to updating or renovating, it is important to learn how to build a stud wall. In this article, we will help you to learn how to build a stud wall. However, it is good to start by understanding what is a stud wall before moving.
What is a Stud Wall?
A stud wall is essentially a standard wall. These walls are built using studs which are pieces of timber or wood that support the structure of the wall. These pieces are attached together using plasterboard, drywall, or in some cases, a combination of plaster and lath.
Distance Between Studs in a Wall
When constructing a stud wall, you should build it in the right way for it to stand the test of time. It means that the wall has to be structurally sound. You have to follow all the code regulations and requirements to make sure that you have a safe stud wall in place.
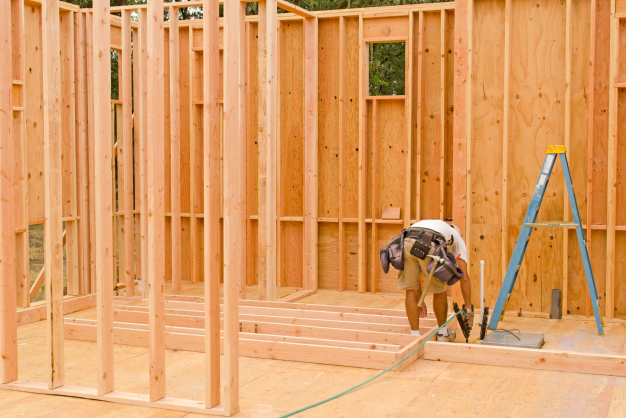
You have to space the studs equally throughout the wall. Studs are typically set 400mm or 16 inches apart. It makes your walls solid and sturdy and also makes it easy to install the plasterboard. The studs line up with the sheet edges of the plasterboard. Therefore, when you get to this step, it will be easier to securely fasten your new plasterboard. Take time measuring the length of the new stud wall before starting to establish the number of studs that you will need. If the spot that you have is wider than your other spacing, include an additional stud in the smaller space to make the build of your wall to last.
The Thickness of a Stud Wall
When you begin your constructions, you have to assemble the right materials. It can be a waste of time and resources to build a new wall just to find out that it cannot hold up. Therefore, you should use the recommended plasterboard and timbers to get a solid end product.
The vertical timbers should be 100mm by 50mm. It gives the wall the sturdiness and durability that it deserves. However, the thickness of the wall will not be 100mm as you will be installing plasterboard on its finish. Plasterboards approximately add 12.55mm of width to the stud wall plus another coat of skim plaster.
By the time you get to the final stage, the thickness of the wall will be close to 130mm. This will tell you that the wall is built properly. However, unfinished stud walls like the ones in some basements have an approximate thickness of 100mm. These dimensions are due to increase once you finish up the wall.
Importance of Building a Stud Wall
When adding a new wall to your home, you should make sure that it is strong and cannot collapse. The stud wall does serve this purpose quite well. The most important thing is to make sure that the wall is well built. The new wall will last if you fasten it properly to the floor and ceiling and choose the right strength of timbers. The use of studs also keeps the wall straight and even. It is a great way of supporting the plasterboard. Therefore, it is good to take your time and set up a stud wall. A plasterboard alone cannot be the best choice. You cannot create these walls unless you have studs.
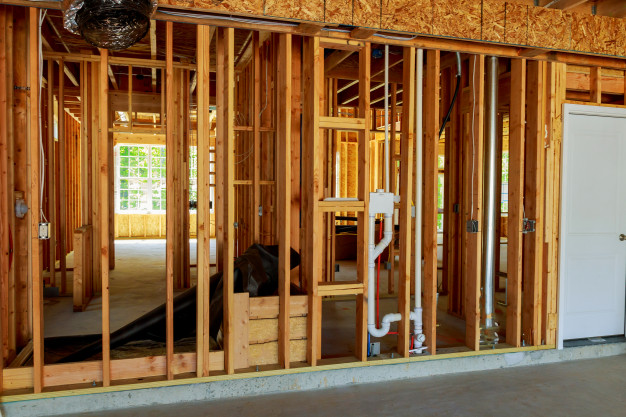
The process of building a stud wall can be a bit daunting especially if you are not a professional. however, it is important to understand the various steps even if you will be hiring someone to work on the wall. It will help you tell whether you are using the right installation procedures or not. The first thing is to make sure that you gather the right materials. These include timber or metal pieces for framing the stud wall, ceiling, floor plates, vertical studs, horizontal braces, nails, metal brace plates, and a door and frame. All these materials have s specific role to play in the installation of stud walls.
Steps to Install a Stud Wall
1. Set up the Support Joists and Check for Wires
Determine where you will install the wall and make sure you will not run into any pipes or wires. Mark the position of the current stud to ensure that you can securely fasten the wall. Also, confirm whether you will be running parallel to the floor joists and make sure that a joist supports your wall directly below. If the joists are running perpendicular to the wall, there is no course of alarm.
2. Install a Floor Plate
You can install the floor plate once you know where the wall should be. You should cut one of the timbers to the length of the floor and nail it down. Nail it to the joists or joists for a secure beginning point. If you will be adding a floor, place one nail in this section because you will remove it later for the doors.
3. Install the Ceiling Portion
Installing the ceiling portion is the next thing. Make sure you are directly above your floor plate by using a plumb and then securely nail it to the ceiling.
4. Set up Your Vertical Studs
You can now move to the vertical studs. Individually measure every stud to make sure it fits the space even when it is not level. Space them approximately 400mm apart by measuring inside the wood pieces. If you include a doorway, the space you leave should be wide enough for both the doorjamb and the door. Repeat this along the length of the wall.
5. Install Noggins Between Your Studs
Measure, cut, and then install noggins between every stud. Offsetting this slightly will give you the room of keeping them approximately at the center.
6. Cut Out Your Doorway Section
If you will install a door, cut out the unneeded part from the doorway. You may use it as the header piece which sits above your door frame to give the stud wall the strength that it needs.
7. Install the Stud Wall
Remember to insulate the stud wall before closing it in with the plasterboard. This insulation helps in muffling sound from outside and also inside the room. It will also help in retaining coolness or heat to maintain room temperature all the time. Use plasterboard to close in one side of your wall before you install the insulation. It will give you a solid surface for working against.
8. The Final Touches
Since the stud wall is up, you can now move to the final touches because bare studs will not give your wall a nice look. Add drywall and plasterboard to finish up the work. It will bring shape to your new room and help you in visualizing how it will look as you enjoy using the space.
Pros & Cons Of Stud Walls
Stud walls have genuinely changed how office spaces look and function. These walls are typically non-load bearing and are usually seen in commercial spaces. As a result, these walls are commercial investments that companies make in order to build cubicles. However, these walls could be better.
Therefore, if you are looking to invest in this, you need to understand the different challenges and benefits of these boards. In this section, we will be looking at some of the pros and cons of installing Stud walls in your office space.
With that note, let us dive right in and look at some of the most prominent factors that should impact your decision to install these walls.
Pros
Stud walls are perfect for commercial spaces as they offer some fantastic benefits to the whole deal. As a result, this section will purely discuss some of the most important benefits of installing these Stud walls in your office spaces.
Private
The foremost benefit of installing these walls is the privacy. These walls are the most cost-effective office partitions that you can get. Subsequently, these walls offer the right amount of privacy. This is one of the key and fundamental benefits of these walls. In fact, this is why office spaces prefer this partition over everything else.
Durable
Durability becomes a considerable issue when offices and commercial spaces are involved. Thankfully, these boards are made to last for life. This means you can just install these partition boards and forget about them. However, if you are genuinely looking for durability, you must opt for a metal stud wall over a timber or a cardboard panel. The former lasts longer and without much wear and tear.
Customizable
The final benefit of installing these panels is that they are customizable. Given their make, you can easily change how these panels look on the fly. However, you can only use some kinds of paints and stickers on these walls. The best way to proceed is to hire a professional to get the customization done. This could solve so many problems for you.
Cons
Stud walls are great in many different ways. However, they are far from perfect. Therefore, you, as a consumer, must know some of the pitfalls of these walls in order to make the right decision. Here are some of the significant problems that you might face if you are planning on using stud walls.
Expensive
One of the most significant and most annoying aspects of these walls is their cost of installation. If you go for a metal framing, the cost of installing it could be considerably higher than compared. As a result, most companies go for timber panels that are less durable than metal panels.
Wireless Interference
Another common problem that people have noted is wireless interference. It is common for stud walls to stop radio and sound waves. As a result, an office with metal stud walls tends to experience higher levels of wave interference compared to other offices. This means it can create network issues.
Conclusion
After hanging the plasterboard, give it a plaster coat and include all the decorative touches. Paint or wallpaper the stud wall to complete your new space. You cannot start enjoying your stud walls.
Read Also:
- Seven Tips To Help You Market Real Estate Property To Millennials
- 5 Tips That Can Help You Get Your House Sold Faster
- What Is A Keeping Room? The Perfect Sidekick For Open Kitchens







Leave A Reply